#Mastery in DIY sawing is not just about the tools you use, but also the techniques that you apply. By exploring a range of arcane techniques, you can refine your cutting precision, improve your efficiency, and elevate your craftsmanship to new heights. Whether you are a seasoned woodworker or just starting your DIY journey, understanding these specialized methods will empower you to achieve professional-quality results. Join us as we investigate into the transformative techniques that will enhance your saw skills and unlock your full potential in your projects.
Understanding the Basics of Sawing
For any DIY enthusiast looking to elevate their sawing skills, understanding the basics is paramount. This foundation will not only make your projects easier but also enhance your overall efficiency and safety. Grasping the anatomy of a saw and why each component is important will provide insight into how to utilize it effectively. Additionally, recognizing the various types of saws and their specific uses will further hone your ability to select the right tool for any job.
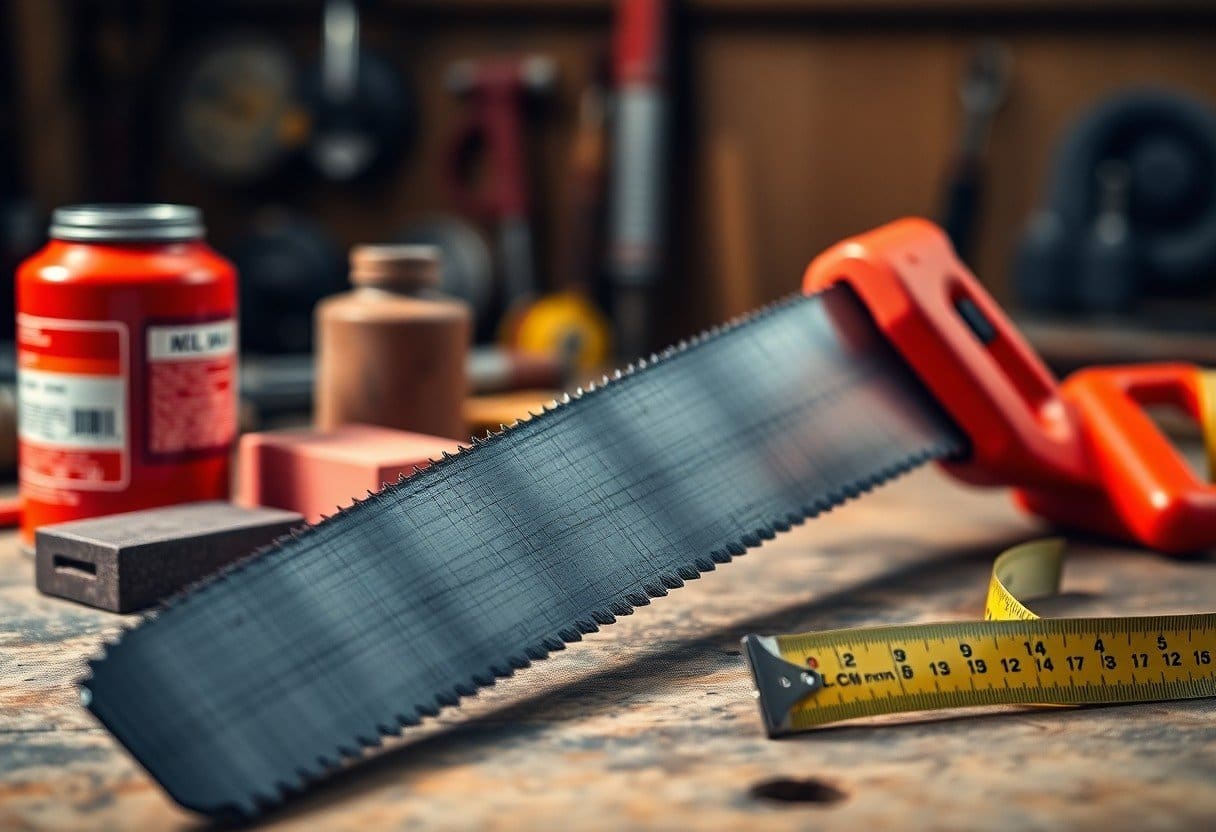
The Anatomy of a Saw
For every saw, there are integral parts that serve distinct functions. The blade is the most critical component, responsible for cutting through the material. Different blades serve different functions – some are designed for fine cuts, while others are made for more aggressive cuts. The handle is where you grip the saw and influence its movement, while the tang is the part of the blade that fits into the handle. Understanding these elements is crucial for masterful sawing.
| Part | Function |
|---|---|
| Blade | Cuts through material |
| Teeth | Grips and slices material |
| Handle | Provides grip for control |
| Tang | Connects blade to handle |
| Kerf | Width of cut made by blade |
Types of Saws and Their Uses
For a successful sawing experience, knowing the types of saws and their intended uses is important. Each saw is designed for specific tasks, so selecting the right one can greatly influence the outcome of your project. Here is a list of some common saw types along with their uses:
- Hand Saw – Ideal for basic cuts, such as wood and thin materials.
- Table Saw – Perfect for precise cuts and ripping lumber.
- Miter Saw – Excellent for angled cuts, typically used in framing or trim work.
- Band Saw – Versatile, used for curved cuts and resawing lumber.
- Sawzall (Reciprocating Saw) – Great for demolition and cutting through various materials quickly.
Knowing these types of saws helps you select the right tool for each task, increasing efficiency and improving results.
| Type of Saw | Primary Use |
|---|---|
| Hand Saw | Basic wood cuts |
| Table Saw | Precision cuts and ripping |
| Miter Saw | Angle cuts |
| Band Saw | Curved cuts |
| Sawzall | Demolition and fast cuts |
Saws are powerful tools that can aid in achieving your creative vision. Familiarizing yourself with the different types and their uses empowers you to tackle diverse projects without hesitation. This knowledge will undoubtedly enhance your confidence when working on DIY endeavors.
Common Mistakes in DIY Sawing
Types of common mistakes can often lead to frustrating or unsafe results when sawing. One of the most prevalent errors is not using the appropriate saw for the task at hand. For instance, attempting to make fine cuts with a rough-cut saw can compromise precision and lead to material wastage. Additionally, incorrect grip and stance can lead to poor control over the saw and increase the risk of accidents.
Common mistakes in sawing can typically be avoided with proper technique and care. One valuable tip is to always ensure that you are cutting on the correct side of the line or mark to achieve the desired finish. Furthermore, neglecting to maintain the saw’s blade can decrease efficiency and accuracy, resulting in additional labor down the line. Awareness of these pitfalls will make a substantial difference in your sawing skills.
A solid understanding of the basics of sawing, including the tools you use and common mistakes to avoid, can help you become a more proficient DIYer. By refining your technique and selecting the right tools for each job, you’ll find that your confidence and competence in sawing will grow tremendously.
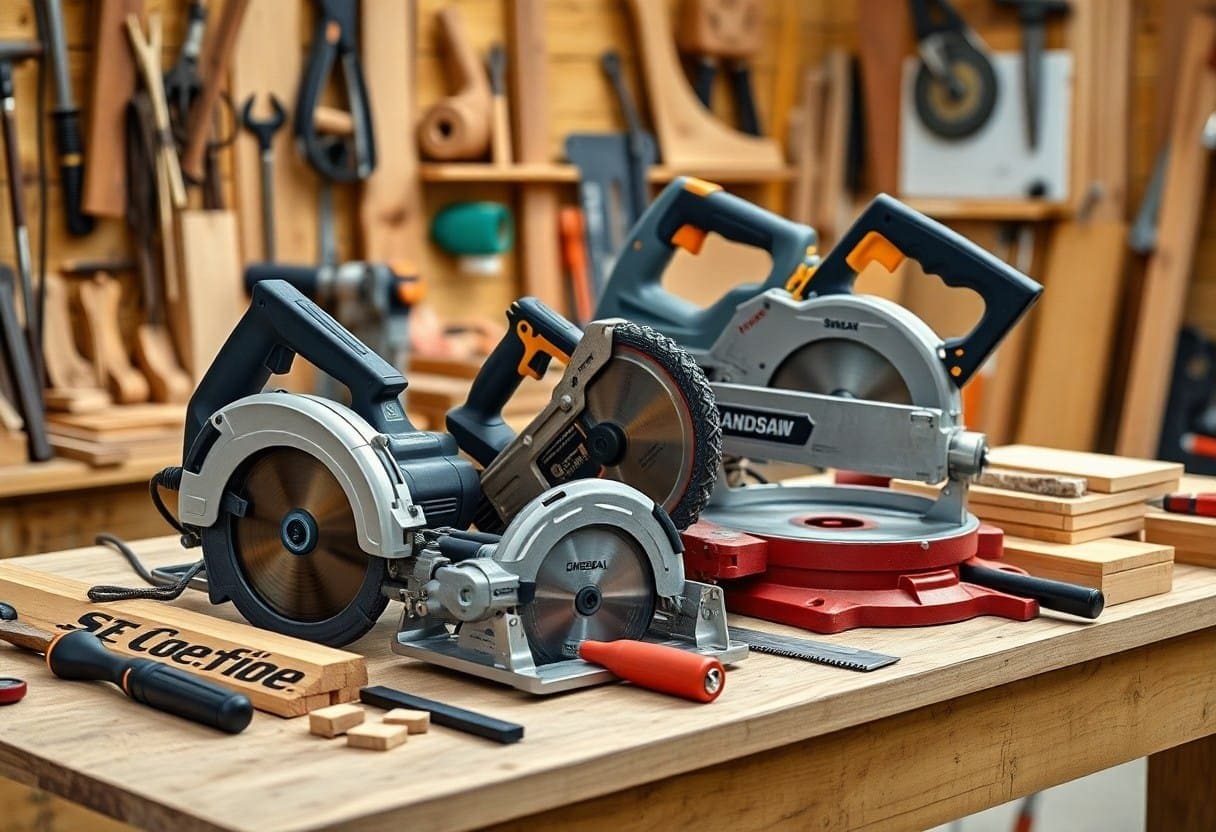
Essential Tools for Mastering Saw Skills
One of the most significant steps towards mastering your DIY saw skills is ensuring you have the right tools at your disposal. Selecting the right saw can greatly enhance your precision and efficiency, making it easier to achieve professional-quality results at home. It’s necessary to consider the specific requirements of your project—whether you’re cutting wood, metal, or plastic, each material may demand a different type of saw. For instance, a miter saw is perfect for crosscuts and angled cuts, while a circular saw excels in making long, straight cuts. Familiarizing yourself with the various types of saws available and understanding their strengths will allow you to choose the best tool for your needs.
Selecting the Right Saw for Your Project
Essentially, taking the time to understand your project and the tasks involved will help you select the tool that maximizes your efficiency and effectiveness. If your DIY project involves intricate cuts, a jigsaw could be an excellent choice due to its adaptability with different materials and cutting methods. Conversely, a handsaw may suffice for straightforward jobs, providing you with simplicity and control. Ultimately, mastering your saw skills starts with making the right choice for the job at hand, which lays a strong foundation for your craftsmanship.
Essential Accessories and Attachments
An often-overlooked aspect of enhancing your saw skills is the use of necessary accessories and attachments. These tools can significantly expand the functionality of your saw, allowing for greater precision and ease in your cuts. For example, a laser guide can help you execute straight cuts with unprecedented accuracy, while a saw stand can provide stability and prevent your workpiece from twisting or shifting during the cutting process. Furthermore, using quality blades tailored to the material at hand will ensure clean, smooth cuts and reduce the likelihood of chipping or splintering.
Essential accessories like clamps, dust bags, and saw horses are also vital for any serious DIY enthusiast. Clamps secure your workpiece firmly, freeing your hands for precise control, while dust bags keep your workspace tidy and safe. Moreover, having a reliable set of saw horses can support larger materials securely, further enriching your crafting experience. By investing in these necessary items, you will not only enhance your cutting quality but also create a more efficient, enjoyable work environment.
Maintenance and Care of Your Tools
On your journey to mastering saw skills, never underestimate the importance of maintaining and caring for your tools. Regular cleaning, oiling, and blade sharpening can prolong the lifespan of your saw and ensure optimal performance. A well-maintained tool will glide through materials more effortlessly, allowing you to make more refined cuts with added safety. Furthermore, checking your tools regularly for signs of wear or damage can prevent accidents and maintain a high standard of work. When your tools operate at their best, you’ll find that your own skills can blossom accordingly.
For instance, neglecting to maintain your blades can lead to dull cuts and increased effort while sawing, negatively affecting your project outcome. By adopting a routine that includes cleaning your tools after each use, inspecting them regularly, and storing them properly, you create an environment where your creativity can flourish. Prioritizing your tools’ maintenance not only enhances your efficiency but cultivates a mindset of respect and care for your craft, necessary ingredients for mastering your DIY saw skills.
Advanced Techniques for Precision Cutting
Unlike the basics of sawing, where you primarily rely on a steady hand and a sharp blade, advancing your DIY saw skills requires mastering techniques that guarantee precision in every cut. Here are some vital methods that can elevate your craft:
- Using a Saw Guide
- Understanding Blade Types
- Practicing Measured Cuts
- Selecting the Right Wood
- Maintaining Your Tool
| Technique | Description |
| Saw Guide | A straightedge that helps to maintain a straight line while cutting. |
| Blade Type | Choosing the right blade for different materials ensures clean cuts. |
| Measured Cuts | Using measuring tools enhances the accuracy of your cuts. |
| Wood Selection | The type of wood impacts the ease and quality of the cut. |
| Tool Maintenance | Regular upkeep of your saw prolongs its lifespan and cuts better. |
Mastering the Straight Cut
Techniques for mastering straight cuts go beyond just following a line. You should secure your material firmly, using clamps if necessary, to prevent any movement during the cutting process. A well-placed saw guide, whether it’s a straightedge or a clamp-on guide, can greatly improve the accuracy of your cuts. Practice using a carpenter’s square to mark your cutting line for added precision.
Additionally, make sure your cutting speed is controlled. Rushing can lead to slippage or inaccuracies, especially with intricate cuts. By focusing on your hand’s stability and the blade’s alignment, you can achieve straight cuts that professionally finish your projects.
Techniques for Curved Cuts
For achieving beautiful curved cuts, your approach will differ significantly from straight cuts. A jigsaw is typically the best tool for these tasks, but you can also use a bandsaw for more complex curves. Before starting, mark your cutting line clearly and consider using a thinner blade, which will allow you more maneuverability as you navigate different curves.
Moreover, it helps to practice with scrap wood if you’re unfamiliar with your chosen technique. By doing so, you’ll gain confidence and skill that will translate into more precise, aesthetically pleasing curves in your actual project.
It’s vital to understand that curved cuts may sometimes require more abrasive techniques, such as sanding, to reach the desired smoothness after cutting. Make sure to allow time for finishing touches, as these can elevate the overall visual impact of your work.
Joints and Angles: Cutting with Precision
Techniques for cutting joints and angles effectively require a clear understanding of the joint types you are working with, such as mortise and tenon or dovetail joints. Mastering the angles involves setting up your saw accurately; for instance, using a miter saw for precise angled cuts. Often, the accuracy of your angle determines the quality and sturdiness of the joint, so taking time to measure and remeasure is crucial.
Another critical aspect is understanding the layout of your joints. Using a combination square to transfer measurements around your workpiece can help ensure that all angles and cuts align perfectly, leading to tighter joints and an overall professional appearance.
Mastering joints and angles not only improves the functionality of your projects but also showcases your craftsmanship. A well-executed joint signifies your advanced skills, making all the difference in your DIY endeavors.
Safety Practices in DIY Sawing
Many DIY enthusiasts underestimate the importance of safety practices when it comes to sawing. However, prioritizing safety not only protects you but also ensures that your projects progress smoothly without unnecessary interruptions. By incorporating a few vital safety measures into your sawing routine, you can elevate your skills while minimizing risks.
Personal Protective Equipment (PPE)
Personal protective equipment (PPE) is your first line of defense against possible injuries in DIY sawing. Investing in high-quality safety gear—such as goggles, gloves, and hearing protection—is crucial. These items will help shield your eyes from flying debris, protect your hands from sharp edges, and prevent hearing loss from loud power tools. Always inspect your PPE for any wear or damage before use, and ensure it fits you properly for maximum protection.
Furthermore, consider wearing durable, non-loose-fitting clothing while sawing. Loose clothes can easily get caught in machinery, leading to serious injuries. Steel-toed boots provide added foot protection against falling objects. By making PPE a regular part of your DIY workflow, you establish a safety-first mindset that will serve you well in all your projects.
Safe Sawing Techniques
Safety begins with understanding and implementing safe sawing techniques. Familiarize yourself with the specific tool you are using, whether it’s a hand saw, circular saw, or jigsaw. Read the manufacturer’s instructions and follow their guidelines to ensure safe operation. Always maintain a firm grip on the saw, stand in a stable position, and keep your hands away from the cutting path to avoid accidents.
The body mechanics of your stance and the method you use during sawing can greatly impact your safety. Try to ensure your workpiece is secured, utilizing clamps when possible to prevent movement. When using power tools, always ensure that the blade is sharp and well-maintained, as dull blades are more likely to cause kickbacks and other potential hazards. Adopting good habits in your sawing techniques will keep you safe while enhancing the quality of your work.
Emergency Procedures and First Aid
The best safety practices include having a plan for emergencies. Before starting your DIY project, familiarize yourself with basic first aid procedures and keep a well-stocked first aid kit nearby. Understand how to treat common sawing-related injuries like cuts, scrapes, and lacerations. Learning how to apply pressure to a wound or use adhesive bandages effectively can make all the difference in a critical moment.
Additionally, ensure that you have an emergency contact list readily accessible. This should include the numbers of local emergency services and nearby medical facilities. You should also inform a friend or family member of your activities in case of an emergency situation. Preparedness and knowledge will empower you to act swiftly when accidents occur, minimizing injury and ensuring a faster recovery process.
It’s vital to practice these emergency procedures regularly, so they become second nature to you. Knowing what to do in a moment of crisis can save valuable time and reduce the severity of injuries during an incident. Being prepared and aware will not only help safeguard your health but will also enhance your confidence as you tackle DIY sawing projects.
Creative Applications of Sawing Techniques
Now that you have a firm grip on various sawing techniques, it’s time to explore how you can apply these skills in creative ways that enhance your DIY projects and even elevate your artistic creations.
DIY Home Improvement Projects
With the right sawing techniques, your home improvement projects can transform from basic renovations into stunning design statements. For instance, if you learn to master precise cuts, you can create custom shelving units that not only serve a functional purpose but also elevate the aesthetic of your space. You can experiment with different types of wood and finishes, making your shelves a unique reflection of your style.
Additionally, using angled or beveled cuts can help you create intricate moldings and trim work that give your rooms a professional touch. Whether you’re working on faux beams, custom window frames, or wainscoting, applying these techniques means you no longer have to settle for store-bought solutions, making your space truly yours.
Crafting and Artistic Uses of Saws
Home woodworking isn’t solely about functional pieces; it can also open the door to artistic expression. You can create intricate wooden sculptures or even beautiful wall art through the careful manipulation of saw techniques. Using different saws such as jigsaws or scroll saws allows for more detailed and creative cuts, enabling you to add character and creativity to your projects.
Creative designs can emerge from your imagination as you explore negative space and layering techniques that utilize sawing as a medium. The versatility of saws means you can shift between functional craftsmanship and creative art projects seamlessly, thereby enhancing both your skills and your artistic portfolio.
Utilizing Saw Skills in Furniture Making
Utilizing saw skills in furniture making opens up a world of opportunities for customization. By mastering cutting techniques, you can create bespoke furniture that fits perfectly into your space and meets your specific needs. Imagine designing a coffee table that reflects your design preferences down to the smallest detail, made with the types of wood, dimensions, and finishes that you all personally select.
As you gain confidence in your cutting skills, you can get adventurous with complex joinery and innovative designs. This can include anything from dovetails to mortise-and-tenon joints that not only provide strength but can also serve as beautiful decorative elements. The more you practice, the more adaptable and intricate your furniture pieces can become, showcasing your growth as a woodworker.
Uses of saw skills in furniture making extend beyond just creating individual pieces; they also allow for an exploration of design principles and woodworking aesthetics that can enhance your overall craftsmanship. Consider combining various materials, employing mixed media, or exploring upcycling techniques to take your furniture projects to the next level. With creativity and technical skill, your furniture-making endeavors can satisfy both functional needs and personal expression.
Troubleshooting Common Sawing Issues
Not every sawing project goes off without a hitch, and recognizing problems quickly is key to maintaining your edge in the workshop. Being aware of common sawing issues and knowing how to address them will elevate your DIY skills to new heights of mastery. This chapter investigates into the most frequent challenges you may encounter while sawing, ensuring that you can refine your technique and achieve flawless cuts.
Recognizing and Fixing Blade Problems
Troubleshooting blade-related issues is an vital skill for any serious saw user. One of the first signs of blade problems is the presence of frayed or burnt edges on your materials, which may indicate that the blade is dull or damaged. Regularly inspecting your blades for wear and tear can save you from unnecessary mistakes and costly material waste. If you detect any irregularities, a careful sharpening session or timely replacement can make all the difference in your project’s outcome.
Additionally, consider the type of blade you are using. Different materials require different blades; a wood-cutting blade will not perform well on metal or plastic. Selecting the appropriate blade for your task is fundamental to ensuring clean, accurate cuts. Make it a habit to familiarize yourself with the varieties available, and always have the right blade on hand.
Addressing Uneven Cuts
Blade alignment is often the culprit behind uneven cuts. If your saw blade is not perpendicular to the workpiece or if the table is not level, your cuts can suffer from misalignment and inaccuracies. Regular calibration of your equipment is vital; take the time to check and adjust your setups before starting any new project. Additionally, employing a steady hand and consistent feed rate while sawing contributes to achieving those smooth, even cuts you desire.
Cuts can also become uneven if you’re pushing the material too quickly through the blade. Maintaining a gentle, controlled speed not only helps your blade cut cleaner but also extends its lifespan. Note, patience is key in achieving precision when sawing; every moment spent ensuring everything is set up correctly pays off in the quality of your final product.
Understanding and Resolving Binding Issues
Troubleshooting binding issues is crucial in maintaining a smooth sawing operation. Binding occurs when the material being cut grips the blade too tightly, leading to a sudden stop or jerk that can damage both your material and your saw. To combat this, ensure that you are using proper support for larger pieces and that the cut path remains clear throughout the process. You might also want to check if the blade you are using is designed for the thickness and type of material you are cutting, as utilizing the wrong blade can exacerbate binding situations.
The key to understanding binding issues lies in recognizing the signs early. If you feel the saw becoming difficult to push or hear unusual sounds, stop immediately and assess the situation. Taking the time to adjust your setup or switch blades can prevent accidents and save you from frustration. A well-maintained workspace and a vigilant approach to your sawing techniques can lead to a smoother, more enjoyable experience overall.
To Wrap Up
Hence, mastering advanced arcane techniques can significantly enhance your DIY saw skills, transforming you from a novice to a confident craftsman. By focusing on precision, understanding the anatomy of your tools, and implementing safety protocols, you not only improve the quality of your cuts but also prolong the lifespan of your equipment. Techniques such as proper blade selection, maintaining an even feed rate, and utilizing jigs for complex cuts will allow you to tackle a wider range of projects with ease, directly boosting your craftsmanship and DIY confidence.
Ultimately, as you incorporate these techniques into your woodwork, you’ll find that patience and practice are your best allies in this journey. By continuously refining your approach and adapting to new challenges, you’ll develop a keen sense of timing and technique that can elevate your projects to a professional level. Commit to this mastery, and you’ll not only enjoy the satisfaction of creating with your own hands but also gain respect in the community for your skills and artistry.